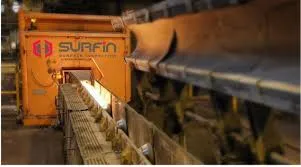
In modern metal manufacturing, defects are more than just blemishes—they’re a threat to safety, quality, and brand reputation. Whether it’s a microscopic scratch on a stainless steel panel or a subtle dent on an automotive sheet, undetected flaws can cause serious downstream failures. To eliminate this risk, manufacturers are rapidly turning to metal surfaces defect detection powered by machine vision systems and AOI systems (Automated Optical Inspection).
This article explores how these technologies are transforming surface inspection processes in the metal industry—from manual guesswork to precise, automated quality control at industrial scale.
The Challenge of Metal Surface Inspection
Metal sheet production involves several stages—casting, rolling, cutting, and coating—all of which can introduce defects. These imperfections may include:
- Scratches
- Pits and dents
- Stains or discoloration
- Burrs and edge deformities
- Corrosion spots
- Wrinkles or waviness
While some flaws are visible to the human eye, others are barely perceptible, particularly under harsh factory lighting or high-speed conditions. Traditional human inspection is prone to inconsistency, fatigue, and limited precision—especially when defects are smaller than 0.3 mm.
This is where automation steps in.
What Is a Machine Vision System?
A machine vision system is a combination of cameras, lighting, lenses, and AI-driven image processing software that mimics human vision—but with much greater speed and accuracy. In metal surface inspection, these systems are used to:
- Capture high-resolution images of the sheet surfaces in real-time
- Detect and classify anomalies with AI-based algorithms
- Determine the size, shape, and position of each defect
- Automatically alert operators or remove defective sheets from the line
Machine vision systems are contactless, non-invasive, and work seamlessly in high-speed environments—ideal for continuous metal processing lines.
AOI Systems: The Brain Behind the Eyes
While machine vision provides the “eyes” of the system, AOI systems act as the “brain.” Originally designed for PCB inspection, AOI systems now offer extensive capabilities in metal surfaces defect detection, including:
- Automated learning: AI models trained on defect libraries to recognize patterns in real time
- Multi-camera configurations: Top, bottom, angled views for detecting different types of flaws
- Micron-level measurement: Identifying defects as small as 0.1 mm in diameter or depth
- Integration with robotics: Enabling defective parts to be automatically rejected, marked, or re-routed
The result? Faster inspection, reduced false positives, and comprehensive quality reporting.
How It Works: Metal Surface Defect Detection Workflow
- Sheet enters inspection zone
Mounted cameras or line-scan sensors begin continuous image capture. - Lighting adjustment
Diffused backlighting or side-lighting highlights surface irregularities. - Image processing
Algorithms enhance contrast and remove noise for clarity. - Defect detection
AI identifies and categorizes scratches, dents, pits, and other anomalies. - Size and location measurement
The system determines the exact coordinates and size of each defect. - Pass/fail criteria
Based on predefined thresholds, the system flags the sheet or section as acceptable or defective. - Sorting or rework
Integrations with PLCs allow automated rejection or routing for rework. - Reporting and analytics
All inspection data is logged for traceability, compliance, and optimization.
Key Benefits of Automated Metal Surface Inspection
- Ultra-High Precision: Detects minute flaws invisible to the naked eye, even at high speeds.
- Consistent and Repeatable: Eliminates human variability and fatigue from the inspection process.
- Increased Throughput: Supports real-time inspection of hundreds of meters of sheet metal per minute.
- Reduced Waste: By catching defects early, manufacturers minimize material loss and reduce rework.
- Digital Quality Records: Each inspection is logged and time-stamped, creating full traceability for audits.
- Scalable & Customizable: Can be adapted for various sheet sizes, metal types, and manufacturing conditions.
Applications Across Industries
Automotive
- Inspecting galvanized steel and aluminum panels for body frames
- Detecting coating inconsistencies before painting
Aerospace
- Evaluating titanium and carbon-fiber composite sheets
- Ensuring zero-defect tolerances on load-bearing panels
Appliance Manufacturing
- Monitoring sheet metal used in washing machines, fridges, ovens
Construction and Roofing
- Ensuring flatness, coating quality, and surface finish of large steel sheets
Consumer Electronics
- Detecting blemishes on brushed or anodized aluminum casings
Case Example: AOI System for 0.2 mm Defect Detection
One manufacturer of stainless-steel kitchen appliances faced rising customer complaints due to micro-scratches. Manual inspectors were missing defects smaller than 0.3 mm. After implementing a machine vision–enabled AOI system:
- Detection accuracy improved to 95% for defects ≥0.2 mm
- Inspection time dropped by 60%
- Scrap rate reduced by 40%
- All results were digitally logged for customer transparency
This upgrade not only enhanced quality but also provided valuable process insights.
Best Practices for Implementing a Machine Vision–AOI Combo
- Define defect thresholds clearly
What size or type of defect warrants rejection? - Use the right lighting configuration
Surface inspection success heavily depends on proper illumination. - Calibrate your system regularly
Ensure consistent performance with scheduled recalibrations. - Train your AI model with real defects
Use historical defect images to improve recognition accuracy. - Integrate with MES/ERP
Streamline reporting, traceability, and corrective actions. - Test with live production samples
Simulate high-speed conditions to ensure accuracy under pressure.
The Future: Smarter Surface Detection
The evolution of metal surfaces defect detection is heading toward:
- Edge AI: On-device processing for faster inspection decisions
- 3D Vision + 2D AOI: Combining depth with surface scans for total profile analysis
- Self-learning models: Adaptive systems that improve over time
- Cloud connectivity: Real-time defect dashboards across factories
By embracing these innovations, manufacturers can achieve true digital transformation on the factory floor.
In an industry where “good enough” isn’t good enough, automated metal surfaces defect detection systems provide a necessary edge. By combining the power of machine vision systems with smart AOI systems, manufacturers can deliver consistent quality, boost efficiency, and maintain a competitive advantage.
As defect tolerances shrink and production demands rise, investing in these smart inspection technologies isn’t just smart—it’s essential.


